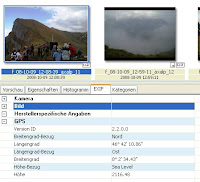
For running, I use a Garmin Forerunner 405. Besides using the watch for sport, I show how you can “geotag your photos”. Geotaging means that you add in the meta information of your pictures the geographic position where you have taken the photo.
How does it work? The GPS track information is compared with the time when your photo as been shot. The X and Y coordinates are stored in the EXIF meta information.
Cookbook:
- Preparation: Take your Garmin Forerunner 405 and your digital camera. Take care, that the time of the camera is synchronized with your Garmin watch.
- Start your hike. Important: Before you start you have to start the stopwatch (In the training mode). The stopwatch has to run the whole hike; otherwise it doesn’t record your trip.
- Back home, you have to transfer the track to your computer: Plug your “ANT-stick” to transfer the data to your Training-Center or the GarminConnect application.
- Once the data is imported in your application, you have to export the track to a tcx file.

- Convert the tcx file to a gpx file, use:
http://www.gpsies.com/upload.do?uploadMode=convert
or: http://www.gpsvisualizer.com/convert_input - Use gpicsync to add the geoposition to your picture
Start the application.
Choose your picture folder.
Choose the gpx file.
Start the process (Press “synchronise”).

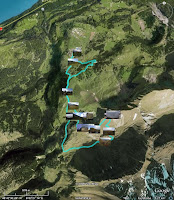
You can use the kml file with Google maps or Google Earth:

Similar posts:


